Having trouble taking screenshots on your HP laptop with Windows 11? You’re not alone, as this is a common issue many users face. In fact, there are several ways to snap a screenshot, each suitable for different situations.
This article provides an easy-to-follow guide on various methods of capturing your screen like a pro, including the use of keys and tools within your operating system. Ready to master the art of screen capturing? Let’s dive right in!
How to Take Screenshot in HP Laptop Windows 11
To take a screenshot in HP Laptop Windows 11, you can use the PrtSc (Print Screen) key and paste it into an application, utilize the Snipping Tool, or use a third-party screenshot utility.
You can also take screenshots using the Game Bar or by using the Volume Up and Power buttons on Surface tablets.
Using the PrtSc (Print Screen) Key and Paste
Pressing the PrtSc (Print Screen) key is a quick and easy way to capture your entire screen. Once pressed, it captures an image of your whole desktop without notifying you. This method doesn’t automatically save the screenshot as a file but copies it to the clipboard instead.
You can then paste this captured image into any application that allows you to insert images, such as Microsoft Word or Paint. To do so, open the desired application and use the CTRL+V keyboard shortcut for pasting.
If your HP laptop has an Fn key next to the Ctrl key on its keyboard, you might have to press Fn + PrtSc instead of only PrtSc depending upon different models’ configurations; refer to the specific model’s manual for exact commands.
It’s important to note that if you capture another screenshot before pasting this one, it will be replaced in the clipboard by a new one.
Using the Snipping Tool
The Snipping Tool is a handy built-in utility in Windows 11 that allows you to capture screenshots with precision. To use the Snipping Tool, simply search for it in the Start menu and open the application.
Once launched, click on “New” and choose from options like Freeform, Rectangular, Window, or Fullscreen to select the area you want to capture. You can also set a delay if needed. After capturing the screenshot, you can annotate it using tools like pens and highlighters.
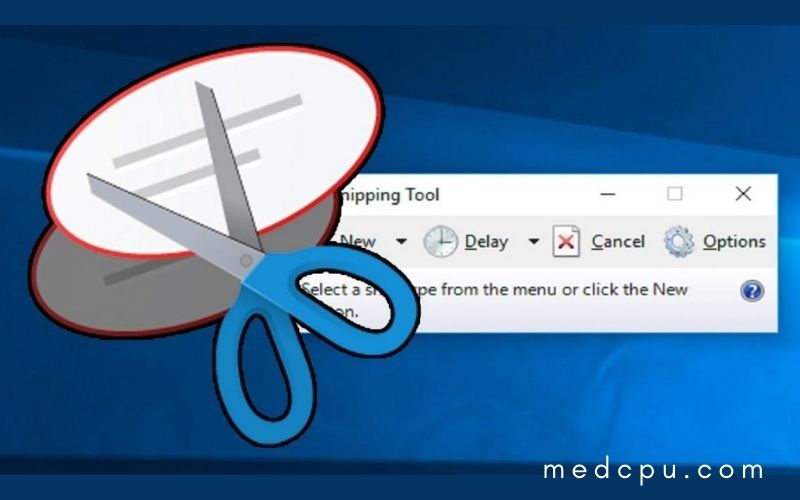
Finally, save or share your snip directly from the Snipping Tool interface.
By utilizing the Snipping Tool on your HP laptop running Windows 11, you have a flexible way of taking screenshots tailored to your specific needs. Instead of capturing everything on your screen like with other methods, this tool allows you to focus on specific areas that matter most.
Using a Third-Party Screenshot Utility
To further enhance your screenshotting capabilities on your HP laptop running Windows 11, you can consider using a third-party screenshot utility. These tools provide additional features and functionalities that may not be available with built-in options.
Look for reliable and user-friendly applications such as TweakShot Screen Capture Tool, which allows you to capture screenshots with ease and edit them according to your preference.
With a third-party utility, you can take full advantage of advanced editing tools, customizable hotkeys, and various capture modes to streamline your screenshotting process.
Utilizing the Game Bar
To quickly capture screenshots on your HP laptop running Windows 11, you can also utilize the Game Bar feature. Simply press the Windows key + G to open the Game Bar overlay. From there, click on the “Capture” button represented by a camera icon.
You’ll have options to capture a screenshot of the full screen or just a specific window. Once captured, you can find your screenshots in the “Captures” folder under “Videos” in File Explorer.
The Game Bar is a convenient way to take screenshots without having to rely on external tools or keyboard shortcuts.
Using the Volume Up and Power Buttons on Surface Tablets
To capture a screenshot on Surface tablets, you can simply use the Volume Up and Power buttons. Press and hold both buttons simultaneously for a moment, and the screen will flash to indicate that the screenshot has been taken.
The captured screenshot will then be saved in your tablet’s Photos app or gallery, ready for you to view or edit as needed. This quick and easy method is great for capturing anything from webpages to documents or even gameplay moments on your Surface tablet.
How to Edit Captured Screenshots
To edit your captured screenshots on an HP laptop running Windows 11, you have a few options. One way is to use the built-in editing tools in Windows. Simply open the screenshot in the Photos app, click on the “Edit & Create” button at the top, and choose from various editing options such as cropping, rotating, adjusting brightness and contrast, and adding filters or text overlays.
Another option is to use third-party image-editing software like Adobe Photoshop or GIMP. These programs offer more advanced features for editing your screenshots, including retouching flaws, applying special effects and filters, and making precise adjustments to color and lighting.
No matter which method you choose, editing your captured screenshots allows you to refine and enhance them before sharing or using them for any purpose. So go ahead and unleash your creativity with easy-to-use editing tools!
Additional Tips and Tricks for Taking Screenshots
Capture partial screens by using the TweakShot Screen Capture Tool.
Capturing Partial Screens
To capture only a specific portion of your screen on an HP laptop with Windows 11, there are various methods you can use. One option is to use the Snipping Tool, which allows you to select and capture a specific area or shape on your desktop screen.
Another method is to utilize third-party screenshot utilities that provide advanced features for capturing selective regions. These tools often have customizable shortcut keys that make the process quicker and more convenient.
Additionally, some laptops have built-in shortcuts like pressing the Fn key along with the PrtSc (Print Screen) key to take a partial screenshot directly without using any external applications.
Using TweakShot Screen Capture Tool
To streamline the process of capturing and editing screenshots on your HP laptop running Windows 11, you can utilize the TweakShot Screen Capture Tool. This user-friendly software allows you to easily capture any part of your screen with just a few clicks.
Whether you need to capture a specific application window or select a custom region, TweakShot provides various options for flexible screenshotting. Additionally, this tool offers editing features like cropping, highlighting, and adding annotations to enhance your captured images.
With TweakShot Screen Capture Tool, taking professional-looking screenshots on your HP laptop has never been easier.
Troubleshooting Common Issues with Screenshotting
If you encounter any issues with taking screenshots on your HP laptop running Windows 11, such as the screenshot function not working or the files not saving properly, this section will provide troubleshooting tips and solutions to address these common problems.
Screenshot Not Working
If you’re having trouble capturing screenshots on your HP laptop with Windows 11, there are a few things you can try to fix the issue. First, make sure that you’re using the correct keyboard shortcut or method to take a screenshot.
If that doesn’t work, check if any third-party software or settings are interfering with the screenshot functionality. You can also try restarting your laptop or updating your operating system to see if that resolves the problem.
If none of these solutions work, you may need to seek further assistance from technical support.
Screenshot Files Not Saving
If you’re experiencing issues with your screenshot files not saving, there are a few things you can try to resolve the problem. First, check if you have enough storage space on your device as this could be the reason why your screenshots aren’t being saved.
You may need to free up some space by deleting unnecessary files or transferring them to an external storage device. Another possibility is that the default save location for screenshots has been changed accidentally.
Make sure to check and reset the save location if needed. Additionally, ensure that you have the necessary permissions and administrative privileges to save files on your computer.
Other Technical Difficulties
Some other technical difficulties you may encounter when taking screenshots on your HP laptop with Windows 11 include black or blank screens being captured, the screenshot not appearing in the clipboard or saved files, and error messages popping up.
These issues can often be resolved by restarting your computer, updating your operating system and drivers, checking for conflicting software, or using alternative methods such as third-party screenshot utilities.
Conclusion
In conclusion, capturing screenshots on an HP laptop running Windows 11 is a straightforward process. Whether you choose to use the PrtSc key and paste method, the Snipping Tool, or a third-party screenshot utility, there are various options available to suit your preference.
Additionally, learning how to edit and troubleshoot common issues will enhance your overall screenshotting experience. With these tips and tricks in mind, you’ll be able to capture and share important moments from your desktop screen effortlessly.
FAQs
1. What are the different methods to take a screenshot on an HP laptop running Windows 11?
There are several ways to take a screenshot on an HP laptop with Windows 11, including using the Print Screen key, the Snipping Tool, and the Windows + Shift + S shortcut.
2. How do I use the Print Screen key to capture a screenshot?
To use the Print Screen key, press it once to capture a screenshot of your entire screen. You can then paste it into an image editing program or document by pressing Ctrl + V.
3. How does the Snipping Tool work for taking screenshots?
The Snipping Tool is a built-in feature in Windows that allows you to select and capture specific parts of your screen. Simply open the tool, click “New,” select the area you want to capture and save or copy your screenshot.
4. What is the Windows + Shift + S shortcut for taking screenshots?
The Windows + Shift + S shortcut opens up a snipping cursor that allows you to choose any rectangular portion of your screen for capturing. After making your selection, you can save or paste your screenshot as desired.
Read Next:

Eyal Ephrat serves as the co-founder and CEO of medCPU.com, where technology is making significant strides in the field of medicine. Through his experience in purchasing PC and laptop equipment and various other tech products, Eyal Ephrat contributes valuable insights to medCPU’s mission.