When you press the power button on your Windows laptop or desktop computer, it is supposed to turn on the screen and keyboard backlight. Unfortunately, there are instances where a faulty power button, overheating, or a loose battery connection can prevent your laptop from turning on.
If you encounter a situation where your laptop fails to turn on even when it is connected to a power source or running on battery power, the following troubleshooting steps can help resolve the issue and get your laptop working again.
Have you ever experienced a laptop that just won’t turn on? If so, it can be incredibly frustrating but also not uncommon. We know all too well how irritating this issue can be when our laptops seemingly refuse to power up – and we’re here to help you find the cause and fix your laptop woes.
medCPU will provide helpful information such as what possible common causes may lead to this problem, basic troubleshooting steps, and advanced troubleshooting ideas from identifying loose connectors to draining the battery of your laptop.
At the end of this post, you should have an idea why your laptop isn’t working and how best to remedy it. So if one day you’re left wondering why your laptop won’t turn on, make sure to check out our blog!
Why Your Laptop Won’t Turn On
Various hardware components, including power supply issues, screen or display issues, faulty batteries, and hardware malfunctions can be the reasons for a laptop not powering on.
Power supply issues
Your laptop suddenly switching off or refusing to start can be a frustrating experience and it’s often the power supply that lies at the root of the problem. A faulty power adapter, laptop screen, battery, or power button issue can prevent your device from booting up.
Another common cause is an overheated computer due to excessive use; when this happens simply allow it to cool before attempting to turn it on again. Loose connections between the battery and motherboard may also result in your device not turning on so make sure these are securely connected.
If you’re having difficulty powering on your laptop after checking all these factors, then try glancing at your LED indicator light for hints as to what’s wrong with your PC—if it’s illuminated then there could be something wrong with its DC source such as incompatible hardware components or low voltage output from faulty batteries.
Screen or display issues
Laptops can be incredibly frustrating when they won’t turn on. One common problem is a screen or display issue, which can range from an uncomfortably dim setting to a total blackout of the monitor.
When these issues arise, it’s important to pinpoint and address the underlying cause before assuming that something more serious is wrong with your device.
A corrupted graphics driver or hiccup in system files may result in an unresponsive black or blank laptop screen (known as the “blackout syndrome”). In rare cases, especially after installing updates, the laptop’s brightness settings might have been disabled accidentally; checking for adjustments here could resolve this seemingly impossible impasse.
Other things to check include any USB drives connected or memory cards inserted at interest time — if left in during start-up procedures, these components would need to be disconnected or removed entirely, and reattempting a restart should follow soon after.
Faulty battery
When a laptop won’t turn on, it could be caused by an issue related to its power supply. A dead or defective laptop battery is often the culprit behind this common issue. It can be identified as one of the potential causes when the laptop works with the adapter plugged in and won’t show any kind of response when unplugged – no lights, fans running, etc. If this is the case, you may need to purchase and fit a new battery before your laptop will turn back on again.
To diagnose this issue further check for faulty connections between components such as display ports or cables that are related to supplying power; also check if there’s anything interfering with signals like another device near your laptop that might cause disruption while attempting to boot it up.
Once all these aspects have been checked, then try resetting the device’s graphics/display driver which can improve performance but also help eliminate minor issues causing it not to turn on at all!

Hardware malfunctions
When it comes to why a laptop isn’t turning on, one of the most common culprits is hardware malfunctions. Hardware components such as the motherboard, RAM, and hard drive are some of the potential causes.
When any one or more of these fail, it can prevent your laptop from powering up – even if you’re sure you followed all the steps correctly. In fact, even an improperly placed cable connection between two components can be enough to shut off power in certain situations!
Though less often seen than other issues like battery failure and overheating problems, hardware malfunctions still need to be considered when it comes time for troubleshooting. If a thorough examination does reveal that hardware is indeed malfunctioning, then at this point it’s best to seek professional help from trained technicians as DIY repair may cause further damage without proper tools or knowledge.
Basic Troubleshooting Steps
If your laptop won’t turn on, start troubleshooting with some basic steps like checking the power supply and battery, adjusting screen brightness, disconnecting external accessories, and unplugging USB drives or memory cards.
Keep reading to find out more helpful solutions.
Check the power supply and battery
This is one of the basic troubleshooting steps for a laptop that won’t turn on. If your laptop’s power supply or battery are not functioning properly, then it may be difficult to use and even unable to start up in some cases.
To determine whether or not the power supply and battery are causing your issue, you should try turning on the computer while using a different source of power such as an adapter or external charger.
In addition, if anything appears to be loose within the laptop itself (e.g., chargers or cords), chances are this could also be affecting its ability to run correctly.
It’s also important to check any indicator lights that appear when plugged in; these provide helpful clues about how much juice is left in the battery life remaining–so check them regularly!
Ignoring these can lead to further issues including draining your device’s overall charge faster than necessary which may prevent your computer from being able to boot successfully next time you attempt it.
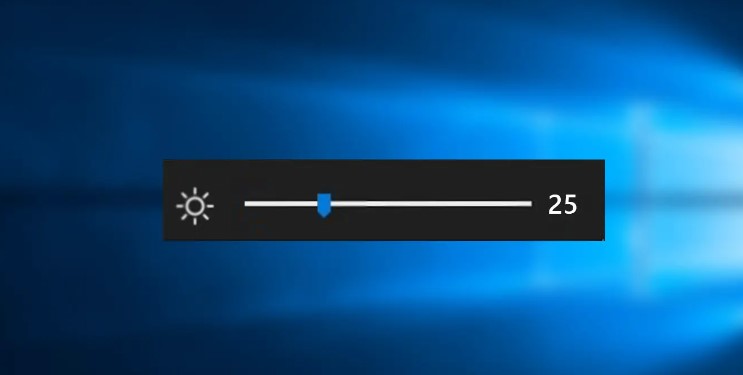
Adjust screen brightness
When it comes to laptop troubleshooting, adjusting the screen brightness can be a simple yet important step. If your laptop is not turning on, it’s possible that power options in Windows 10 may have been set incorrectly.
Increase the screen brightness level through Control Panel and adjust the setting using one of the following methods: select Battery saver mode from Power Options or change Advanced settings for Philips Brilliance panels.
Brightness control issues are usually caused by software bugs such as faulty updates or buggy display drivers. To address these problems, disabling automatic brightness levels within Windows 10 is necessary for fixing any related issues with incorrect display contrast levels and other visual glitches.
Disconnect external accessories
To diagnose why your laptop won’t turn on, disconnecting any attached external accessories is one of the most important steps. External devices such as USB drives, memory cards, and thumb drives often draw power from the computer when they’re plugged in.
This can put a strain on a laptop’s resources limiting its ability to boot up or function properly. Even if the device isn’t actively being used it can still cause critical system errors that could prevent the laptop from turning on at all.
Additionally, nonessential display devices connected through cables or Bluetooth will use extra resources that may need to be freed up for successful troubleshooting. Keeping two screens connected while troubleshooting might also confuse your computer making it unable to identify which screen it should try and send an image to resulting in a black screen issue instead of successfully booting up In both cases removing these extra items will help limit potential problems during startup so you don’t have to waste time experimenting with other solutions first before attempting this step again later down the line.
Unplug USB drives or memory cards
When troubleshooting why your laptop won’t turn on, it’s important to check if you may have left any USB drives, SD cards, or other external devices connected. If an extra device is attached to the laptop and interferes with its startup process, this can prevent the laptop from powering up.
Not only that but depending on what type of device is connected, it could also cause error messages or crashes.
It’s best practice then to disconnect all unnecessary devices before trying to power up the computer again. Remove removable storage like a memory card reader or thumb drive you might be using in connection with your PC, as well as any peripheral accessories like peripherals for gaming such as keyboards and controllers.
Advanced Troubleshooting Steps
If the basic troubleshooting steps don’t work, try more advanced techniques such as running a rescue disc, booting into Safe Mode to diagnose and repair computer glitches, or checking for loose connections.
Try a rescue disc
One of the most effective solutions for getting a laptop to turn on is to use a rescue disc. Many laptops come with an extra CD or DVD called a “rescue disc”, which contains files that offer recovery options in Windows without relying on your own Operating System.
This means that if you can access these files from within the operating system, you can troubleshoot any issues and potential causes for not being able to boot correctly.
Once the rescue disc has been inserted into the DVD-ROM drive, restart your computer and it will begin running process scans and checks in order to identify what caused the problem in the first place so it can be fixed as quickly as possible.
If nothing is wrong internally, then using this method along with others should help get your laptop up and running again. In some cases, however, it may require further troubleshooting such as looking at hardware components or downloaded software that could have caused conflicts within Windows itself.
Using SFC/SCANNOW through a rescue disc is another option that many experienced technicians would recommend since it runs preloaded repairs specifically meant for those types of problems.
Boot into Safe Mode
Taking your laptop into Safe Mode is an effective way to troubleshoot and identify underlying problems that might be preventing it from turning on correctly. Booting into Safe Mode allows you to access the computer, bypassing any programs and files that could be inhibiting a successful startup.
Windows 10 users can boot up in Safe Mode through the Troubleshoot > Advanced Options > Startup Settings menu as well as pressing 5 or F5 when restarting after selecting Restart in the Startup Settings page.
In spaces like businesses where multiple pieces of hardware are linked together, systems often have difficulty starting up due to compatibility errors or even viruses. Running into these types of issues is fairly common; however, with Help from Safe Mode, they can often be circumvented without having to go through extensive diagnostics processes.
This diagnostic mode can allow technicians and non-techs alike to diagnose what precisely caused their system’s slowdowns and malfunctions by working directly with safe functions like networking, checking keyboard usability, disconnecting/reconnecting external accessories as well detecting faulty hardware before continuing onward toward Normal Operation.
Check for faulty or incompatible hardware
This is an important step to troubleshoot why your laptop won’t turn on. Whether it’s a hardware issue or incompatibility with other components can be the reason behind the problem.
It could be that there’s something wrong with one of the laptop’s parts, like a broken power supply, a malfunctioning screen, a faulty battery, etc. Check if any new devices you might have connected recently are causing an issue; disconnect all external accessories such as USB drives and memory cards to see if anything has already interfered with your computer’s performance since powering up last time.
Take the initiative for diagnosing potential issues by booting into safe mode or creating a rescue disc; both these methods should give you inspection options before starting the troubleshooting process in order to identify incompatible hardware which may otherwise go unnoticed.
Make sure everything looks spec according to online documentation – remove what shouldn’t be present and make sure RAM nests perfectly without functionality problems being caused due to misplaced pins or module instability.
Incompatible hardware should always be removed when found – as it can easily lead to further severe malfunctions even in apparently working systems.
Diagnose and repair screen issues
As laptop users, it’s really frustrating when our device fails to power on. The cause could be anything from loose connections to incompatible hardware. To identify and fix the issue, we need to take a few steps in troubleshooting and diagnosing any potential screening issues that may prevent your laptop from booting up.
One of the most common solutions is adjusting screen brightness or turning off external accessories like USB drives or memory cards connected to the laptop if present. Display problems can manifest as a blank screen with no activity shown at all on turn-on — in this case, we recommend checking all cables running into the computer for any loosening since an improperly fixed cable connection might be preventing powering up entirely.
If you have recently installed new software or hardware components, these might also be causing display incompatibility so try removing them as well while performing further troubleshooting actions – a rescue disk helps sometimes too!
Advanced levels of troubleshooting encompass draining out any excess power held by various components within your laptop, reinstalling graphics/display driver software (which drivers depend on each particular make & model), closely inspecting indicator lights which clues into what problem area you should focus resources towards, and finally allowing for some cooling down time before trying yet another turn-on attempt – this increases chances of success after prolonged hours working due high-demands put onto running machines.
Draining the Power
Performing a power drain on your laptop can help troubleshoot a variety of issues preventing it from turning back on. To do this, hold down the power button for about 20 seconds to fully discharge the laptop – this can potentially fix startup problems such as black screens or other display problems.
This might also be an effective solution if the laptop won’t stop running even when it seems like you properly shut it down (in which case, draining the power will effectively “reset” itself).
Draining your device’s battery may also resolve a glitchy issue caused by an old and misfiring battery. In such cases, you should consider replacing the battery to ensure that it produces enough power needed in powering up your device correctly and avoid more damage in the future.
Powering off devices with drained batteries is recommended anyway since frequent use of low-juice laptops might cause harm due to not being able to provide enough electricity for all components’ functions.
Resetting Graphics/Display Driver
Resetting the graphics/display driver on your laptop is a crucial step to take when trying to get it safely back up and running. Fortunately, this can be easily done with just a few simple steps.
For starters, PC users can press the Windows key + Ctrl + Shift + B shortcut, or Mac users use Command+Option+Shift+R to instantly reset their graphics driver in cases where their laptop won’t turn on due to faulty display issues such as flickering or blacking out.
It is also recommended before resetting any drivers that you download the most recent version of whatever driver you are working with in order to ensure maximum compatibility with your hardware and software settings.
Additionally, obtaining Display Driver Uninstaller (DDU) can help cut back time drastically when attempting to reset any sort of graphic-intensive application that may simply not want to start up at all.
DJU will work by uninstalling outdated versions of itself from specific devices, allowing for more efficient reinstalls if needed while still keeping existing configurations intact during a Reset process – saving precious energy from wait-around times occurring between reboots!
Checking Indicator Lights for Hints
When a laptop won’t turn on, the first thing to do is look at any indicator lights. These will usually be located near the power button and other inputs such as USB ports. The meaning of these colors varies among different makes or models, but they can give you valuable hints as to what might be wrong with your laptop.
For instance, many laptops have a light that glows when it’s plugged into an external charger. A solid color like blue indicates everything is working fine, while blinking lights may indicate something else – check if the cable or outlet is loose or disconnected.
On some systems, there’s also a green LED that shows if the battery is charging properly; you’ll want to investigate this further if it does not turn on when connected to an AC adapter.
If nothing is illuminated here, then confirm whether the plug has enough charge by plugging it into another appliance first before trying again with your laptop.
These indicator lights work together with power checks and basic troubleshooting steps–such as adjusting brightness and disconnecting accessories–to provide clues about why your machine isn’t starting up properly.
Pay close attention to all indicators for possible signs of malfunctioning hardware components or incompatible devices that need addressing before continuing with attempting more advanced solutions like booting into Safe Mode or draining all power sources from within your system’s BIOS menu.
Leaving the Laptop to Cool
Sometimes, your laptop just won’t turn on. Before you attempt further complex troubleshooting steps, it’s best to allow some time for the laptop to cool down and gain power. Laptops are equipped with special safety circuits which cut power when any components overheat.
This is done in order to protect the machine from making serious damage due to heat exposure or accumulation. Overheating can be caused by dust buildup blocking cooling vents, relentless tasks pushing their limits, or a lack of maintenance and clean-up – all of which might lead to potential hardware failure!
Generally speaking, laptops require a proper ventilation for optimal performance; concerning powering up after an overheated shutdown, leaving the laptop undisturbed until it cooled off is advisable because immediately pushing the laptop (by repeatedly attempting a start-up) can cause permanent unrepairable damage due to its internal thermal management system that prevents hazardous temperature increase during operation.
Therefore properly allowing time for cooling will benefit you both short term – since restarting now might not even work—and long term since preventing this kind of hardware crash/failure helps preserve better general computer health throughout future uses.

Checking for Loose Connections
One of the necessary troubleshooting steps to figuring out why a laptop won’t turn on is to check any loose connections that could be impacting the power and functionality. Loose connections can cause a wide range of issues, including preventing or interrupting power flow and data signals.
Broken wires, frayed connectors, rattling cables – these are all indicators of trouble when it comes to your laptop’s wiring setup.
Therefore, checking all components for signs of loosened contacts should always be the first step during system diagnostics. Not just visual inspection but also feel-based evaluation – monitors unplugged from their sockets can sometimes benefit from having their plugs slightly reinserted; USB ports often require removing and replacing cables in order to clean metal surfaces; memory slots need regular cleaning inside every few months for improved performance.
Doing this kind of routine maintenance not only protects your computer’s long-term health but also prevents serious incidents like overheating or short circuits which could lead to even more expensive repairs down the line.
Conclusion
We’ve seen the various issues that can make a laptop not turn on and the basic and advanced troubleshooting steps to try responding to such an issue. It is important to check both internal and external components when addressing this common laptop issue, such as the power supply, battery, screen brightness settings, USB drives or memory cards attached, loose connections inside the power port or AC adapter wall plug-in, etc. Furthermore, draining the laptop of all power by unplugging it for some time can do wonders in resolving certain software-related problems while more serious hardware malfunctions may require further technical assessment from professionals to be accurately identified and fixed.
Hopefully, this blog post has equipped you with enough information about why your laptop won’t turn on and what steps you could take should you happen in such a situation in the future!
Read Next:

Eyal Ephrat serves as the co-founder and CEO of medCPU.com, where technology is making significant strides in the field of medicine. Through his experience in purchasing PC and laptop equipment and various other tech products, Eyal Ephrat contributes valuable insights to medCPU’s mission.