In today’s digital age, screen recording has become an essential tool for various purposes, such as creating tutorials, sharing gameplay videos, or capturing important moments from your computer screen. If you own an Asus laptop and want to learn how to screen record, you’ve come to the right place. In this article, medCPU will guide you through the process of screen recording on an Asus laptop, providing step-by-step instructions and helpful tips to ensure a seamless experience.
Why record your Asus laptop screen?
We often find ourselves in situations where we need to record our Asus laptop screen. Perhaps you’re creating a tutorial for YouTube or capturing an online meeting for later reference; the uses are as diverse as they come.
Laptop screen recording enables us to capture on-screen activities, which can be instrumental in demonstrating software applications, illustrating technical procedures or just documenting a memorable gaming session.
Asus laptops, distinctively popular with their robust and user-friendly features, also facilitate efficient screen recording. With various built-in and third-party options available such as Windows Game Bar or Awesome Screenshot & Recorder; you’ll find that capturing your Asus laptop’s activity has never been easier.
Whether it’s about sharing professional presentations, educational tutorials, troubleshooting guides or simply recording your favorite gameplay sequences – knowing how to effectively use these tools will significantly elevate your digital experience.
Read more: How To Screenshot On Asus Laptop
How to screen record on Asus laptop using Awesome Screenshot & Recorder
Embarking on this journey of screen recording on an Asus laptop is easy with the Awesome Screenshot & Recorder. This renowned tool offers a plethora of options, making it one of our top choices for screen recording.
It’s simple to get started – first, download and install the software from its official site or any trusted third-party platform.
Once installed, launch the program and choose your preferred setting under ‘Capture’ in the toolbar menu; you’ll find selections tailored for full-screen capture, selected area capture, or even specific browser tab capturing.
No need to feel overwhelmed by tech jargon as these settings describe exactly what they do! For higher quality recordings fit for presentations or YouTube videos, adjust your video resolution up to 4K under ‘Options.’ With HD Video Converter Factory Pro integrated into this powerful software, rest assured that your videos will come out crystal clear.
To kick off your recording session simply press ‘Start Recording’. A new window will appear where you can further customize your video by adding titles using the drag-to-add titles panel among other features available on this fantastic screen recording app.
An essential tip we want to share involves securing permissions before embarking on any form of laptop screen recording endeavor—click ‘Enable Permissions’ in Settings before you hit record! This way, you’re sure to avoid running into any unnecessary hiccups during your Asus laptop’s triumphant debut as a filming device.
You’ve now unlocked limitless possibilities – whether it’s producing content for YouTube videos or crafting engaging work presentations – all made possible right at home with our step-by-step guide for screen recording on Asus laptops using Awesome Screenshot & Recorder.
How to record screen on your Asus laptop Windows 10 with Game Bar
Let’s dive right into the process of recording your screen with Windows 10’s built-in Game Bar feature. First, make sure the feature is activated by navigating to your computer’s settings.
Choose Gaming > Game bar and then turn on the switch under “Record game clips, screenshots, and broadcast using the Game bar.”.
Starting a screen recording session is quick and simple. Just press the Win + G key simultaneously to launch the Game Bar controls at any time during gameplay or other PC activities you want to record.
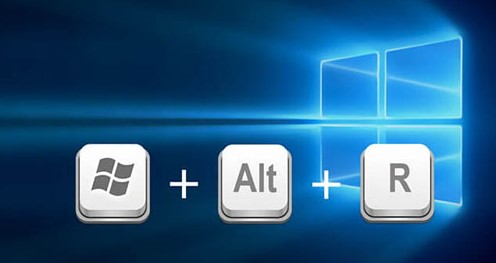
Click on ‘Start Recording’, or press Win + Alt + R for an instant start. Easily stop recording by clicking on the ‘Stop’ button or using the same keyboard shortcut.
Adjusting more detailed settings such as audio levels is also possible in this integrated tool—just select the Audio tab after launching the game bar panel for several self-explanatory options.
For high-quality recordings that impress viewers, we highly recommend setting the video quality to High in Capture Settings Menu found under the ‘Captures‘ option within the Gaming section of Windows Settings.
Experiment with these steps for a smooth sailing experience while capturing screen content on your Asus laptop!
How to record your Asus screen using Camtasia
We’ve got a powerful tool called Camtasia at our disposal when it comes to recording the screen of an Asus laptop. It’s not only a cross-platform screen recorder but also doubles up as an effective video editing software.
After installing Camtasia on your Asus laptop, prepare for recording by choosing ‘Screen Recording Mode.’ You’ll find this option under the ‘Record’ tab on top.
Getting started is easy: Simply press ‘Rec’ in the quick panel for instant activation of the recording mode. To personalize your videos, use the drag feature to add title panels conveniently located in Camtasia’s dashboard.
Moreover, if you desire high-definition quality recordings, consider using HD Video Converter Factory Pro alongside Camtasia.
One important tip while using this reliable laptop screen recording software; always ensure that you have enabled permissions for screen recording – particularly if you plan to share your creations online like YouTube videos and tutorials.
With these uncomplicated steps and handy tips, creating sharp and professional-looking Asus laptop recorded screens with Camtasia becomes absolutely effortless.
How to record the screen in your Asus laptop via VLC Media Player
To record the screen on your Asus laptop using VLC Media Player, follow these steps:
- First, make sure you have VLC Media Player installed on your Asus laptop. If not, you can download it for free from the official website.
- Open VLC Media Player and go to the “Media” tab in the top menu bar. From there, select “Open Capture Device.”.
- In the “Capture Mode” dropdown menu, choose “Desktop.” This will allow you to record your entire screen or a specific window.
- Adjust any desired settings such as frame rate and output file format by clicking on the small tool icon next to the dropdown menu.
- Click on the red “Play” button to start recording your screen.
- When you’re finished recording, click on the square stop button in VLC Media Player’s control panel at the bottom of the screen.
- Your recorded video will be saved in your default Videos folder unless otherwise specified during setup.
Using VLC Media Player as a screen recorder is a convenient option with its user-friendly interface and various customizable settings for a seamless recording experience on your Asus laptop.
Tips for Successful Screen Recording on Asus Laptop
Recording your screen on an Asus laptop can be a useful tool for various purposes, including creating tutorials, sharing gameplay footage, or capturing important presentations. To ensure successful screen recording, here are some valuable tips:
- Prepare your laptop: Before starting the recording process, close any unnecessary applications or programs running in the background to free up system resources. This will help prevent lag and ensure smooth recording.
- Choose the right software: There are several screen recording software options available for Asus laptops, such as Awesome Screenshot & Recorder, Game Bar (Windows 10), Camtasia, and VLC Media Player.
- Take some time to explore these different tools and determine which one best suits your needs.
- Adjust settings accordingly: Depending on what you’re planning to record, adjust the video quality settings of your chosen screen recording software accordingly. Keep in mind that higher-quality videos may result in larger file sizes.
- Plan out your content: It’s essential to have a clear idea of what you want to capture before hitting the record button. Create an outline or script if necessary to stay organized during the recording process and avoid unnecessary pauses or mistakes.
- Use keyboard shortcuts: Most screen recording software offers handy keyboard shortcuts for starting/stopping recordings or pausing/resuming them effortlessly. Familiarize yourself with these shortcuts to streamline your workflow and save time.
- Identify potential distractions: Make sure you choose a quiet environment when doing screen recordings on your Asus laptop to minimize background noise interference that could distract viewers from focusing on your content.
By following these tips for successful screen recording on an Asus laptop, you’ll be able to create high-quality videos smoothly without any technical hiccups along the way!
Conclusion
In conclusion, learning how to screen record on your Asus laptop can open up a world of possibilities. Whether you’re creating tutorials, capturing gameplay, or simply sharing content with friends and family, having the ability to record your screen is invaluable.
With a variety of software options available, such as Awesome Screenshot & Recorder and Camtasia, you can easily find the perfect tool that suits your needs. So don’t hesitate – start exploring the exciting world of screen recording on your Asus laptop today!
FAQs
1. What software can I use to screen record on my Asus laptop?
There are several software options available for screen recording on your Asus laptop, such as OBS Studio, Camtasia, and Bandicam.
2. How do I start a screen recording on my Asus laptop?
To start a screen recording on your Asus laptop, you can use the pre-installed Windows 10 Game Bar feature by pressing the “Windows key + G” shortcut and clicking the red record button.
3. Can I customize the settings while screen recording on an Asus laptop?
Yes, depending on the software you are using, there may be options to customize settings such as resolution, audio sources, frame rate, and file format during your screen recording.
4. Where can I find my recorded screen videos on my Asus laptop?
By default, most screen recording software will save your recordings in a designated folder or allow you to choose a specific location to save them. You can typically find them in the “Videos” or “Recordings” folder in your user directory.
Related Posts:

Eyal Ephrat serves as the co-founder and CEO of medCPU.com, where technology is making significant strides in the field of medicine. Through his experience in purchasing PC and laptop equipment and various other tech products, Eyal Ephrat contributes valuable insights to medCPU’s mission.